Replacing noisy fan with heatsink on ASUS A8N-SLI motherboards
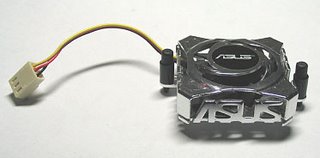
Most of ppl reporting that their new motherboards A8N series (except Premium ver) have annoying noise from chipset fan. Seems that Asus use cheap fan that running at very high speed (about 6000 RPM).

At first I thought about replacing it with another , quiet cooler like IceHammers NB-Cooler with Cu heatsink and low noise fan, but after searching the web I found that there is better solution - Zalman ZM-NB47J fanless heatsink. Its cheaper and have adjustable pins for better compatibility. IceHammer`s heatsink pin holes are NOT compotable with this board!
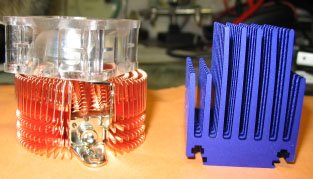
WARNING! It is taller then original ASUS cooler! On left photo you can see ZM-NB47J (right one) and NB-Cooler (left one).
So lets start! First of all have in mind that you doing this at your own risk! This operations may void warranty!

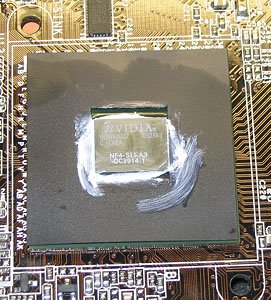
Take your motherboard out on table, and carefully remove original heatsink from motherboard. From the bottom side of it, you will notice how pins fixed and gently free them with pincers. Now when you removed Asus heatsink your mobo will look like this ------>
Clean the chip surface from original grease, but I suggest you to leave the original thermal pad (on photo around chip) for better thermal connection. Next , put Zalman`s grease or if you have better one (e.g. KPT8).
Then, do mounting according heatsink manual for adjusting pins for motherboard`s mounting holes. Please, be very careful not to damage the chip so try not to move heatsink when it will be mounted! Finally ensure that all fitted firmly in place.
Now , after power on, go to BIOS and switch off chipset fan monitoring - since you don`t have it now, or you may receive a warning message ! ) that's all!
If you do everything right, you will enjoy cool and silent work from your motherboard. I found that in most cases it is more effective then original Asus chipset fan - temperature at least the same (~33-37C).
Some people suggest to put additional quiet fan for this heatsing , but its not needed in fact, especially if you have a good computer case with front and rear coolers.

At first I thought about replacing it with another , quiet cooler like IceHammers NB-Cooler with Cu heatsink and low noise fan, but after searching the web I found that there is better solution - Zalman ZM-NB47J fanless heatsink. Its cheaper and have adjustable pins for better compatibility. IceHammer`s heatsink pin holes are NOT compotable with this board!

WARNING! It is taller then original ASUS cooler! On left photo you can see ZM-NB47J (right one) and NB-Cooler (left one).
So lets start! First of all have in mind that you doing this at your own risk! This operations may void warranty!

Take your motherboard out on table, and carefully remove original heatsink from motherboard. From the bottom side of it, you will notice how pins fixed and gently free them with pincers. Now when you removed Asus heatsink your mobo will look like this ------>
Clean the chip surface from original grease, but I suggest you to leave the original thermal pad (on photo around chip) for better thermal connection. Next , put Zalman`s grease or if you have better one (e.g. KPT8).
Then, do mounting according heatsink manual for adjusting pins for motherboard`s mounting holes. Please, be very careful not to damage the chip so try not to move heatsink when it will be mounted! Finally ensure that all fitted firmly in place.
Now , after power on, go to BIOS and switch off chipset fan monitoring - since you don`t have it now, or you may receive a warning message ! ) that's all!
If you do everything right, you will enjoy cool and silent work from your motherboard. I found that in most cases it is more effective then original Asus chipset fan - temperature at least the same (~33-37C).
Some people suggest to put additional quiet fan for this heatsing , but its not needed in fact, especially if you have a good computer case with front and rear coolers.


Comments